All About
Brushes
Your brushes are the single most important
tool you will use in decorative painting. More often than not,
you will decide to invest in a good set of starter brushes as it
is one of the first steps to successfully learning decorative painting.

You will also want to learn how to maintain
your brushes in the best condition so that they continue to give
you hours of painting pleasure...and no doubt save you from buying
more brushes to replace damaged ones.
Choose your brushes wisely, look after them carefully
and painting will be a joy. Abuse them, and painting will be
a constant struggle!
Buying brushes
Getting the most of your brushes starts with
how you buy them:
-
If you are just starting to paint, you'll
be all excited about buying brushes. Its very tempting to go
to an art supply shop and just buy what you think you need
but its best to get your first set of brushes for decorative
painting from your teacher. This helps to ensure that you don't end up
buying brushes which are not suitable or the right sort for
decorative painting techniques.
-
If your teacher doesn't stock brushes in her studio she will most likely provide you with a basic list of brushes that you can buy in your area.
- When you decide to treat yourself to new
brushes, look for quality instead of quantity. Select brushes
that are of the highest calibre that you can afford. Of course
they are likely to cost more but you'll be grateful for the
investment as it will save you the heartache of spending more
money to replace the cheap ones that did not work right or
did not last.
Using your brushes
There's a right way to do everything and how
you load your brushes goes a long way in helping you maintain them
in good condition and getting the results you want in your painting:
-
Do not roll or twist the brush when you
are loading it with paint. You'll only distort the shape of
the brush. If you keep twisting it when you load paint, the
brush will forget its original shape.
-
Always load the full length of the brush
hairs. If you only load half of the length, the weight of the
paint will make the brush hairs bend and eventually it will
stay that way permanently. A brush is meant to be loaded completely
or it won't do its job.
-
For detail work - load the entire brush
then stroke the tip across the edge of your palette, removing
the excess paint, to make a sharp point. Flip the brush to
make sure you get an even load.
-
A dry brush will drag across your surface.
On a round brush, the friction will cause the tip to bend out
permanently. On a flat brush, you will get "whiskers" as
the outer corners curl out. Reload your brush frequently when
painting. When you feel the brush drag, don't simply press
the brush harder. When the brush drags it means you've run out of paint - pick up more colour
or tip the edge of the loaded brush into water.
-
Keep an eye on the consistency of the
paint throughout your painting session especially in humid
climate. Using acrylic paint that has begun to thicken can
ruin a brush quickly. It also will not load properly and you
will not get the results you expect in your painting.
-
Make it a habit to always look at your
brush to see how well you have loaded it BEFORE you place the
brush on your project! If it does not look right it will not
paint right. If there isn't enough paint, go back to the palette
and load more paint. If there's too much paint, tap it on a
paper towel to remove the excess and go back to the palette
and just re-coat the outside of the brush - there's still paint
inside the brush.
-
When your paint is too thick, thin it
by adding a little water with your palette knife, never use
your brush to mix paint EXCEPT when the instructions call for "brush-mixing".
In this case, load the first colour by going into the puddle
of paint and pulling the brush towards you as you would normally
load a brush, then pick up the second colour and pull towards
yourself, stroking it on the pallette to get a good mix.
-
Never use the brush you use for your decorative
work for basecoating - the abrasive nature of the unprepared
surface tends to wear out your brush faster and you will not
get the right results when you use it for decorative work.
Keep them separate - save your best brush for decorative work
and get hardy brushes for basecoating.
-
If you can afford it, buy two brushes - one for basecoating and and one for varnishing.
-
Always consciously try to use both sides of the
brush when painting to avoid wearing it down on one side.
Cleaning your brushes
Its very tempting at the end of a painting
session to just give your brushes a cursory massage under the tap
and pack them up...but cleaning is the most important activity
that prolongs the life of your brushes.
If brushes are uncared for by proper cleaning,
they will lose their purpose - a flat brush will never give you
a flat stroke and a round brush will never give you that comma
stroke.
-
Swishing your brush in water removes most
of the paint but never all. Once you've finished painting,
pour some liquid hand soap into the palm of one hand and drag
the brush hairs in one direction only towards you. You'll start
to see paint come out of the brush. With the soap still in
the brush, take the brush hairs between the fingers of one
hand and "massage" the hairs - you'll see more paint
come out.
-
After washing with handsoap, pour some
brush cleaner (DecoMagic by DecoArt or BrushPlus by Plaid is
very effective) into the palm of your hand and repeat the above
step.
-
Once you're satisfied that your brushes
have no more paint in them, return your brushes to their shape,
use your fingers to press the chisel closed on the flats. Every
time you wash out a brush, return it to its original shape,
even if you know you'll use it again in a few minutes. Massage
a little hair gel into your brush to keep its original shape
before putting it away - remember to wash it out thoroughly
before you use it the next time.
-
Never use hot water to clean your brushes.
The shape of a synthetic filament is formed by heat, so it
can also be changed by heat. Never ever dry your brushes with
a hairdryer - the hairs burn!
-
If you have a brush that's lost its shape,
you can try reshaping it before discarding it. Dip it quickly
in and out of hot water just boiled, then shape it by dragging
it across a smooth damp synthetic sponge. It may take several
attempts, and may not work at all - but you have nothing to
lose.
-
Once acrylic paint has dried inside your
brush hairs, it will not come out even if you soak it in brush
cleaner! There is a last resort - methylated spirit, also known
as rubbing alcohol or surgical spirit, which can be purchased
at a pharmacy. Pour a small quantity in a small porcelain or
glass bowl enough to cover the brush hairs. Stroke back and
forth to soak it in the alcohol, remove and immediately massage
the hairs with your fingers. Keep doing this until you start
to see dried paint "melt" in the alcohol. Try not
to let the alcohol dry in the brush. Wash the brush immediately
with soap and water and massage the hairs well to remove all
traces of the loosened paint.
Storing your brushes
-
While your brushes are still wet after
washing, the best way to keep them is flat.
-
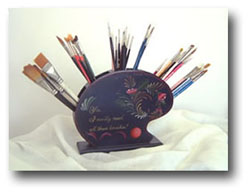
The safest way to keep your brushes when
they are dry until you want to paint again, is upright in one
of many brush-keeping tools or a jar or a pencil holder. You
can keep them in a flat box at home, but don't travel with
them in that box because the brushes may rest against in side
of the box and the hairs will remain bent.
-
If you store your brushes by standing
them in a mug or can or something similar for sometime, make
sure you rinse your brushes before using them. Grime or dust
particles tend to accumulate in the brush hairs if you don't
use them for sometime and, if you don't rinse them before painting,
the grime and dust get in your paint and onto your project.
-
Keep the plastic guards you get when you
buy new brushes for when you're travelling. Cut an opening
in the guard on a 45 degree angle. This doubles the size of
the hole and easing the brush back into the guard is much simpler.
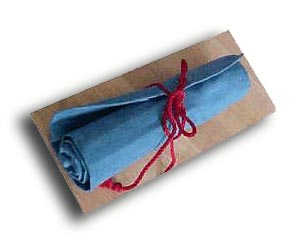
- Use a good brush-holder to carry your brushes when you go to your classes or when you're travelling.

|