Decorative Painting Tips: Crackling
-
Follow the directions for crackling
for whatever crackle medium you are using - different brands
have different ways of application and may work differently.
-
It's best to try out a few sample pieces
to see what works best under which conditions. Most artists
will however tell you that crackling is a process which we
don't have too much control over the results! No matter which
brand of crackle medium you are using, apply the colour (the
topcoat) and leave it alone to work. Don't be tempted to
touch up the topcoat you've just applied because the crackle
has already started to work.
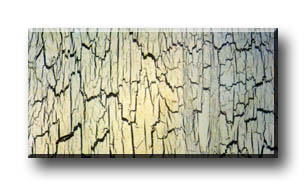
- When applying the crackle medium, use
your 1" flat brush and a "slip-slap", criss-cross
motion. If you apply a thick layer, you will get large cracks,
whereas if you apply a thinner layer, the result is fine
cracks.
-
A crackled surface needs to dry for
a minimum of 12 hours (24 hours is better) before any further
painting or decoration is done on it or before it is varnished.
-
Intense and continuous heat helps to
crackle the surface. If you use a hairdryer to speed up the
drying process, the more heat you apply, the larger the cracks.
In hot weather, you'll get nice cracks by just waiting for
the piece to cure.
-
Exposing the surface to different temperatures
during the curing process gives it a variety of cracks.
-
Read the directions on the bottle of
crackle medium you are using carefully - some brands do not
advocate the use of a hairdryer to speed up the crackling
process.
- The brush strokes you use when applying the topcoat also determines
how your crackle will turn out. If you use a "slip-slap",
criss-cross motion, you will get even-looking cracks all over
the surface. If you apply long, broad strokes, you get elongated
cracks. Experiment.

|